Posts

Showing posts from September, 2019

How to remove Admin Password from RealTime Attendance Machine?

Image
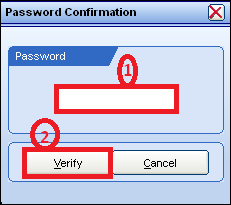
You can remove Admin Password from you RealTime Biometric Machine trough Software. Method- Go to File Menu Click on Hardware Setup Enter the Password rss110092 Click on Verify Click on Connect Click on Remove Admin Now you can enjoy.

How to enable Caller ID for CO Line in panasonic ns300 epabx?

Image
You can enable Caller ID for CO Lines... Login your  Web Maintenance Console Go to  PBX Configuration Expand  Configuration Click on Slot Go to LCOT6 Click on Card Property Change Caller ID Signaling FSK into DTMF Change Caller ID (DTMF) Start Code-1 A into None Change Caller ID (DTMF) Start Code-2 D into None Go to again  PBX Configuration Expand  CO & Incoming Call Select  DIL Table and Port Settings Enable CLI Ring for DIL Day/Night

How to make COS Manager to another KTS phone in panasonic ns300 epabx?

Image
You can make manager another KTS phone. Press  Program Button  on KTS Phone Enter the  Programing Code (* #) Enter the  Password (1234) Enter the  Sys Program No (511) Press Enter Select COS No Select Enable. Press Enter

How to download report from RealTime biometric?

Image
You can download Attendance Report from Desktop Application of RealTime biometric machine with the help of following steps. Step-1 Run your RealSoft Desktop Application Login with User & Password Click on Transfer Step-2 Click on Connect Then click on Download Data Step-3 Click on OK Step-4 Click on Transaction Menu Go on Generate Shift Click on For All Employee Step-5 Click on Show Shift Click on Generate Shift Click on OK Step-6 Click on Process Step-7 Select Periodic Select Date Range Click on Process Click on OK Step-8 Go to Report Menu Click on Monthly Report Step-9 Click on OK Step-10 Finally your attendance Report will be generated If you want other format then click on Export

How to download database as text format from RealTime biometric?

Image
You can download data as text format in your pen drive from RealTime biometrics. Step-1 Insert formated Pen Drive upto 8GB Press Menu Button Step-2 Select USB Disk Press OK Button Step-3 Select Download All General Log Press OK Button Step-4 Promt a message Action Success Press OK Button

How to configure O365 exchange email manually in outlook for windows pc?

Image
Office 365- Outlook Configuration Manually in Windows PC. Step-1 Open  Control Panel Step-2 Click on  Mail Step-3 Click on Email Accounts Step-4 Click on  New Step-5 Select  E-mail Account   Click on Next Step-6 Select M anual setup or additional server type Click on Next Step-7 Select Microsoft Exchange Server or compatible service Click on Next Step-8 Enter the following details in the field... Server: outlook.office365.com User Name: Login Name Click on Next Step-9 Click on  Security tab Uncheck Encrypt data between Microsoft Outlook and Microsoft Exchange Step-10 Select Anonymous Authentication Click on Apply Step-11 Click on  Connection tab Check Connect to Microsoft Exchange using HTTP Step-12 Click on  Exchange Proxy Settings Step-13 Enter outlook.office365.com Check Only connect to proxy servers that have this principal name in their certificate Enter msstd

How to configure O365 exchange email automatic in outlook for windows pc?

Image
Office 365- Outlook Configuration in Windows PC. Step-1 Open Control Panel Step-2 Click on Mail Step-3 Click on Show Profile Step-4 Click on Add Step-5 Type Profile Name Step-6 Click on OK Step-7 Type Your Name          Email Address          Password Step-8 Click on Next Step-9 After Green Check Mark on all Three Lines Click on Next Step-10 Click on Finish